If you are getting link a new debit or credit card to make an instant payment error or we couldn't complete your purchase using card MasterCard error while paying through paypal by using Debit Card means actually there is Problem with card or You are Paying in Wrong Currency means order in Dollar you are paying in Rupees. Check below Video to complete Solution.
Tuesday 24 December 2013
Friday 20 December 2013
Solution to change Network device Name (eth0) in CentOS, Fedora Linux
Open the /etc/udeve/rules.d/70-persistent-net.rules and change NAME as your require.
cat /etc/udev/rules.d/70-persistent-net.rules
# This file was automatically generated by the /lib/udev/write_net_rules
# program, run by the persistent-net-generator.rules rules file.
#
# You can modify it, as long as you keep each rule on a single
# line, and change only the value of the NAME= key.
# PCI device 0x15ad:0x07b0 (vmxnet3)
SUBSYSTEM=="net", ACTION=="add", DRIVERS=="?*", ATTR{address}=="00:50:56:b6:64:c5", ATTR{type}=="1", KERNEL=="eth*", NAME="eth0"
Tuesday 17 December 2013
Rocks Cluster : untrusted X11 Warning Message when SSH X11 compute Nodes
When we login ssh with X11 from rocks master node to computer node it doesn't allow X11 to forward as :
$ ssh node10 -X
Warning: untrusted X11 forwarding setup failed: xauth key data not generated
Warning: No xauth data; using fake authentication data for X11 forwarding.
Last login: Tue Dec 17 20:34:52 2013 from test.rocks.com
Rocks Compute Node
Rocks 6.1 (Emerald Boa)
Profile built 14:32 21-Nov-2013
$ ssh node10 -X
Warning: untrusted X11 forwarding setup failed: xauth key data not generated
Warning: No xauth data; using fake authentication data for X11 forwarding.
Last login: Tue Dec 17 20:34:52 2013 from test.rocks.com
Rocks Compute Node
Rocks 6.1 (Emerald Boa)
Profile built 14:32 21-Nov-2013
For that In Rocks Master node edit /etc/ssh/ssh_config add following line :
ForwardX11Trusted yes
Monday 16 December 2013
Installation of GCC 4.8.2 compilers on CentOS 6 x86_64
Before Installing GCC 4.8.2 get packages and pre-requisties :
GCC 4.8.2 http://mirrors.ispros.com.bd/gnu/gcc/gcc-4.8.2/gcc-4.8.2.tar.bz2
Pre-requesties :
MPC http://www.multiprecision.org/mpc/download/mpc-1.0.1.tar.gz
MPFR http://www.mpfr.org/mpfr-current/mpfr-3.1.2.tar.bz2
GMP https://gmplib.org/download/gmp/gmp-5.1.3.tar.bz2
ISL ftp://ftp.irisa.fr/pub/mirrors/gcc.gnu.org/gcc/infrastructure/isl-0.11.1.tar.bz2
CLOOG ftp://ftp.irisa.fr/pub/mirrors/gcc.gnu.org/gcc/infrastructure/cloog-0.18.0.tar.gz
Install Development Tools :
yum groupinstall "Development tools"
Install 32 bit library support :
yum install glibc-devel.i686 glibc-i686
First extract gcc-4.8.2.tar.bz2 :
tar -jxvf gcc-4.8.2.tar.bz2
cd gcc-4.8.2
Now got that extracted gcc folder extract pre-requesties and rename extracted folders to their names as simillary:
tar -zxvf ../mpc-1.0.1.tar.gz
tar -jxvf ../mpfr-3.1.2.tar.bz2
..
mv mpc-1.0.1 mpc
mv mpfr-3.1.2 mpfr
...
Now configure GCC :
./configure --prefix=/opt/gcc-4.8.2/
make
make -k check
make install
Friday 20 September 2013
Service modules_dep in Linux Enable or Disable
Service modules_dep in Linux Enable or Disable - Enable it
It is one-time bootup script, not a daemon. So it does not consume resources after bootup. You can browse its source code at /etc/init.d/modules_dep
It's a small script that fixes module.dep for iptables
It is one-time bootup script, not a daemon. So it does not consume resources after bootup. You can browse its source code at /etc/init.d/modules_dep
It's a small script that fixes module.dep for iptables
Saslauthd Linux Service enable or disable
Saslauthd Linux Service disable or enable is depend on your postfix
saslauthd is a daemon process that handles plaintext authentication requests on behalf of the SASL library
Postfix for SMTP Authentication using SASL for this saslauthd necessary
so if you are running postfix then enable Saslauthd service otherwise disable Saslauthd service
saslauthd is a daemon process that handles plaintext authentication requests on behalf of the SASL library
Postfix for SMTP Authentication using SASL for this saslauthd necessary
so if you are running postfix then enable Saslauthd service otherwise disable Saslauthd service
Thursday 5 September 2013
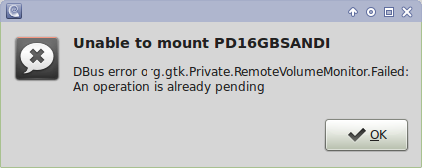
Solution : DBus error org.gtk.Private.RemoteVolumeMonitor.Failed:An operation is already pending
If you get Unable to mount usb drives and getting DBus error org.gtk.Private.RemoteVolumeMonitor.Failed:An operation is already pending like below
Solution is Do as root
[root@sys ~]# cd /media/
[root@sys media]# ls -a
. .. 04376381-139c-4953-bd94-8d9ae3a23790 .hal-mtab-lock NAGESH J
remove .hal-mtab-lock
[root@sys media]# rm -rf .hal-mtab-lock
[root@sys media]#
Wednesday 4 September 2013
Which services should be disabled in Linux
To enhance performance you can disable some services in Linux system check below information to disable unimportant services
-----------------------------------------------------------------
NetworkManager 0:off 1:off 2:on 3:on 4:on 5:on 6:off
You can do without NetworkManager, but I find it awfully handy for dealing with changing wifi on a laptop (which you say you're using). If you don't need it, though, no harm in turning this off.
-----------------------------------------------------------------
acpid 0:off 1:off 2:on 3:on 4:on 5:on 6:off
This is probably what's making your power button work, and what makes the system suspend when you close the lid. You can live without it, but probably don't want to.
-----------------------------------------------------------------
auditd 0:off 1:off 2:on 3:on 4:on 5:on 6:off
This is the userspace part of the Linux Auditing System, which is a more secure way of logging kernel-level events than syslog. Among other things, it records SELinux alerts. Strictly speaking, you don't need it.
-----------------------------------------------------------------
avahi-daemon 0:off 1:off 2:off 3:on 4:on 5:on 6:off
This is for autodiscovery of services on a network — printers being a big example. It's not required.
-----------------------------------------------------------------
cpuspeed 0:off 1:on 2:on 3:on 4:on 5:on 6:off
This will probably just start the right in-kernel CPU frequency scaling driver as an on-start operation, and not run anything. (And if it can't for whatever reason and runs the daemon, you probably want it.)
-----------------------------------------------------------------
haldaemon 0:off 1:off 2:off 3:on 4:on 5:on 6:off
This runs hald, which is in the process of being obsoleted but which is, as of Fedora 14, still used for a few things. Best to leave it on for now
-----------------------------------------------------------------
ip6tables 0:off 1:off 2:on 3:on 4:on 5:on 6:off
iptables 0:off 1:off 2:on 3:on 4:on 5:on 6:off
This sets up the kernel-level packet filter and doesn't leave any user-space daemon running. Leave it on.
-----------------------------------------------------------------
irqbalance 0:off 1:off 2:off 3:on 4:on 5:on 6:off
This is for multi-cpu/multi-core systems. If you just have one, it will exit harmlessly after a few seconds. You can gain a few milliseconds of startup time by chkconfiging it off.
-----------------------------------------------------------------
lvm2-monitor 0:off 1:on 2:on 3:on 4:on 5:on 6:off
mdmonitor 0:off 1:off 2:on 3:on 4:on 5:on 6:off
If you're sure you're not using lvm (note that you can use ext4 on top of lvm!), you can turn off lvm2-monitor, and the same goes for md software RAID and mdmonitor.
-----------------------------------------------------------------
messagebus 0:off 1:off 2:on 3:on 4:on 5:on 6:off
This is the d-bus system message bus. If you're using a modern desktop environment, you'll basically need this. If you're not, you can get away without it, but will probably have to hack things up. (I'm pretty sure gdm needs it, for example.)
-----------------------------------------------------------------
netfs 0:off 1:off 2:off 3:on 4:on 5:on 6:off
This doesn't run any daemons, but starts any network filesystems in /etc/fstab/. It's harmless either way.
-----------------------------------------------------------------
nfslock 0:off 1:off 2:off 3:on 4:on 5:on 6:off
rpcbind 0:off 1:off 2:on 3:on 4:on 5:on 6:off
rpcgssd 0:off 1:off 2:off 3:on 4:on 5:on 6:off
rpcidmapd 0:off 1:off 2:off 3:on 4:on 5:on 6:off
If you're not using NFS, NIS, or some other RPC-based service, all of these can go off.
-----------------------------------------------------------------
rsyslog 0:off 1:off 2:on 3:on 4:on 5:on 6:off
You technically don't need to log anything, but you probably really want to. You could consider tuning it to work in a more lightweight way on your laptop.
-----------------------------------------------------------------
smolt 0:off 1:off 2:on 3:on 4:on 5:on 6:off
This sends anonymized usage statistics back to the Fedora Project. It doesn't run anything, but there's a cron file in /etc/cron.d/smolt which checks the state here. If you don't want it, I suggest removing the entire smolt package. (But consider leaving it — the data is useful to the people putting the distro together for you, and it's only once a month.)
-----------------------------------------------------------------
udev-post 0:off 1:on 2:on 3:on 4:on 5:on 6:off
Another run-and-done startup script, this one needed to keep rules generated during the boot process around once the system is up. Leave it on.
-----------------------------------------------------------------
Above information taken from
http://unix.stackexchange.com/questions/9242/which-services-should-be-disabled
-----------------------------------------------------------------
NetworkManager 0:off 1:off 2:on 3:on 4:on 5:on 6:off
You can do without NetworkManager, but I find it awfully handy for dealing with changing wifi on a laptop (which you say you're using). If you don't need it, though, no harm in turning this off.
-----------------------------------------------------------------
acpid 0:off 1:off 2:on 3:on 4:on 5:on 6:off
This is probably what's making your power button work, and what makes the system suspend when you close the lid. You can live without it, but probably don't want to.
-----------------------------------------------------------------
auditd 0:off 1:off 2:on 3:on 4:on 5:on 6:off
This is the userspace part of the Linux Auditing System, which is a more secure way of logging kernel-level events than syslog. Among other things, it records SELinux alerts. Strictly speaking, you don't need it.
-----------------------------------------------------------------
avahi-daemon 0:off 1:off 2:off 3:on 4:on 5:on 6:off
This is for autodiscovery of services on a network — printers being a big example. It's not required.
-----------------------------------------------------------------
cpuspeed 0:off 1:on 2:on 3:on 4:on 5:on 6:off
This will probably just start the right in-kernel CPU frequency scaling driver as an on-start operation, and not run anything. (And if it can't for whatever reason and runs the daemon, you probably want it.)
-----------------------------------------------------------------
haldaemon 0:off 1:off 2:off 3:on 4:on 5:on 6:off
This runs hald, which is in the process of being obsoleted but which is, as of Fedora 14, still used for a few things. Best to leave it on for now
-----------------------------------------------------------------
ip6tables 0:off 1:off 2:on 3:on 4:on 5:on 6:off
iptables 0:off 1:off 2:on 3:on 4:on 5:on 6:off
This sets up the kernel-level packet filter and doesn't leave any user-space daemon running. Leave it on.
-----------------------------------------------------------------
irqbalance 0:off 1:off 2:off 3:on 4:on 5:on 6:off
This is for multi-cpu/multi-core systems. If you just have one, it will exit harmlessly after a few seconds. You can gain a few milliseconds of startup time by chkconfiging it off.
-----------------------------------------------------------------
lvm2-monitor 0:off 1:on 2:on 3:on 4:on 5:on 6:off
mdmonitor 0:off 1:off 2:on 3:on 4:on 5:on 6:off
If you're sure you're not using lvm (note that you can use ext4 on top of lvm!), you can turn off lvm2-monitor, and the same goes for md software RAID and mdmonitor.
-----------------------------------------------------------------
messagebus 0:off 1:off 2:on 3:on 4:on 5:on 6:off
This is the d-bus system message bus. If you're using a modern desktop environment, you'll basically need this. If you're not, you can get away without it, but will probably have to hack things up. (I'm pretty sure gdm needs it, for example.)
-----------------------------------------------------------------
netfs 0:off 1:off 2:off 3:on 4:on 5:on 6:off
This doesn't run any daemons, but starts any network filesystems in /etc/fstab/. It's harmless either way.
-----------------------------------------------------------------
nfslock 0:off 1:off 2:off 3:on 4:on 5:on 6:off
rpcbind 0:off 1:off 2:on 3:on 4:on 5:on 6:off
rpcgssd 0:off 1:off 2:off 3:on 4:on 5:on 6:off
rpcidmapd 0:off 1:off 2:off 3:on 4:on 5:on 6:off
If you're not using NFS, NIS, or some other RPC-based service, all of these can go off.
-----------------------------------------------------------------
rsyslog 0:off 1:off 2:on 3:on 4:on 5:on 6:off
You technically don't need to log anything, but you probably really want to. You could consider tuning it to work in a more lightweight way on your laptop.
-----------------------------------------------------------------
smolt 0:off 1:off 2:on 3:on 4:on 5:on 6:off
This sends anonymized usage statistics back to the Fedora Project. It doesn't run anything, but there's a cron file in /etc/cron.d/smolt which checks the state here. If you don't want it, I suggest removing the entire smolt package. (But consider leaving it — the data is useful to the people putting the distro together for you, and it's only once a month.)
-----------------------------------------------------------------
udev-post 0:off 1:on 2:on 3:on 4:on 5:on 6:off
Another run-and-done startup script, this one needed to keep rules generated during the boot process around once the system is up. Leave it on.
-----------------------------------------------------------------
Above information taken from
http://unix.stackexchange.com/questions/9242/which-services-should-be-disabled
Saturday 31 August 2013
How to prevent accidental delete rm -rf * in Linux
To prevent accidental delete rm -rf * in Linux by different ways
If you want to prevent any important directory deleted accidental
Create a file named -i in that directory. How can such a odd file be created? Using touch -- -i or touch ./-i
Now try rm -rf *:
[root@server]# touch {1..4}
[root@server]# touch -- -i
[root@server]# ls
1 2 3 4 -i file1 file2 directory1
[root@server]# rm -rf *
rm: remove regular empty file `1'? n
rm: remove regular empty file `2'?
Here the * will expand -i to the command line, so your command ultimately becomes rm -rf -i.
So command will prompt before removal. You can put these files in your /, /home/, /etc/, / etc.
OR
Use --preserve-root as an option to rm. In the rm included in newer coreutils packages, this option is the default.
create alias to rm
alias rm=rm -i --preserve-root
--preserve-root means do not remove `/' (default)
OR
Use safe-rm
Safe-rm is a safety tool intended to prevent the accidental deletion of important files by replacing /bin/rm with a wrapper, which checks the given arguments against a configurable blacklist of files and directories that should never be removed.
Users who attempt to delete one of these protected files or directories will not be able to do so and will be shown a warning message instead:
[root@server]# rm -rf /usr
Skipping /usr
Thursday 29 August 2013
Solution : Check Variable in Linux Bash is Float or Interger
Hi,
Here solution for checking a variable in Linux Bash is Float or Integer by using grep.
---- file : test.sh
function check_int(){
echo $1 | grep "^[0-9]*$" > /dev/null
if [ $? -ne 0 ]; then
echo $2 : $1 is not a number;
else
echo $2 : $1 is a number
fi
}
function check_float() {
echo $1 | grep "^[0-9]*\.[0-9]*$" > /dev/null
if [ $? -ne 0 ]; then
check_int $1 $2
else
echo $2 : $1 is a float number
fi
}
check_int 12 my_number
check_float 12.2 my_number
check_int 12a my_number
check_float 12a2 my_number
--------------------
yadavmahi@localhost:~/MahiYadav/scripts> bash test.sh
my_number : 12 is a number
my_number : 12.2 is a float number
my_number : 12a is not a number
my_number : 12a2 is not a number
Here solution for checking a variable in Linux Bash is Float or Integer by using grep.
---- file : test.sh
function check_int(){
echo $1 | grep "^[0-9]*$" > /dev/null
if [ $? -ne 0 ]; then
echo $2 : $1 is not a number;
else
echo $2 : $1 is a number
fi
}
function check_float() {
echo $1 | grep "^[0-9]*\.[0-9]*$" > /dev/null
if [ $? -ne 0 ]; then
check_int $1 $2
else
echo $2 : $1 is a float number
fi
}
check_int 12 my_number
check_float 12.2 my_number
check_int 12a my_number
check_float 12a2 my_number
yadavmahi@localhost:~/MahiYadav/scripts> bash test.sh
my_number : 12 is a number
my_number : 12.2 is a float number
my_number : 12a is not a number
my_number : 12a2 is not a number
Wednesday 28 August 2013
Create Fake Swap in OpenVZ VPS if you get swapon failed: Operation not permitted Error
if you get swapon failed: Operation not permitted Error even if you run as root it is because in your VPS swap creation is not allowed
follow below steps to Create Fake Swap in OpenVZ VPS
[root@server] free -m
total used free
Mem: 4096 104 3991
-/+ buffers/cache: 104 3991
Swap: 0 0 0
create shell script file add lines like below
[root@server] vi fakeswap.sh
#!/bin/bash
SWAP="${1:-512}"
NEW="$[SWAP*1024]"; TEMP="${NEW//?/ }"; OLD="${TEMP:1}0"
umount /proc/meminfo 2> /dev/null
sed "/^Swap\(Total\|Free\):/s,$OLD,$NEW," /proc/meminfo > /etc/fake_meminfo
mount --bind /etc/fake_meminfo /proc/meminfo
free -m
[root@server] chmod +x fakeswap.sh
[root@server] sh fakeswap.sh
[root@server] free -m
total used free
Mem: 4096 104 3991
-/+ buffers/cache: 104 3991
Swap: 512 0 512
to create 1024MB Swap run like below
[root@server] sh fakeswap.sh 1024
[root@server] free -m
total used free
Mem: 4096 104 3991
-/+ buffers/cache: 104 3991
Swap: 1024 0 1024
How to Copy with overwrite in Linux
To copy content with default overwrite in linux use below command
[root@server1] yes | cp -rf directory1/* /home/directory2
[root@server1] yes | cp -rf directory1/* /home/directory2
How to restrict download speed in wget
To restrict download speed in wget use below command
wget http://wordpress.org/latest.zip --limit-rate=500k
where --limit-rate=500k speed
wget http://wordpress.org/latest.zip --limit-rate=500k
where --limit-rate=500k speed
How to Enable .htaccess and Verify if .htaccess file is running
Step 1 : changes in the .htaccess should take effects if you change .conf file of apache like below
<Directory ..>
...
AllowOverride None
...
</Directory>
Should be changed to
<Directory ..>
...
AllowOverride All
...
</Directory>
Step 2 :
check for below line in .conf file of apache
LoadModule rewrite_module modules/mod_rewrite.so
If it is commented(#), uncomment (remove # )
Now restart apache server
Step 2 :
Enter some junk value into your .htaccess restart apache server and visit your URL.
If .htaccess is working, you should get a
500 Internal Server Error
<Directory ..>
...
AllowOverride None
...
</Directory>
Should be changed to
<Directory ..>
...
AllowOverride All
...
</Directory>
Step 2 :
check for below line in .conf file of apache
LoadModule rewrite_module modules/mod_rewrite.so
If it is commented(#), uncomment (remove # )
Now restart apache server
Step 2 :
Enter some junk value into your .htaccess restart apache server and visit your URL.
If .htaccess is working, you should get a
500 Internal Server Error
Solution: Install/Update Wordpress plugins without providing FTP access
Hi if you don't have FTP access to your wordpress server yow follow below steps to Install/Update Wordpress plugins from wordpress admin panel
step1 : Change "wp-content" folder permissions to 777
sudo chmod -R 777 wp-content
step2 : In "wp-config.php" file add define('FS_METHOD', 'direct');
example :
......
......
/** MySQL hostname */
define('DB_HOST', 'localhost');
/** Database Charset to use in creating database tables. */
define('DB_CHARSET', 'utf8');
/** The Database Collate type. Don't change this if in doubt. */
define('DB_COLLATE', '');
define('FS_METHOD', 'direct');
.........
.........
Wednesday 21 August 2013
Solution : Making of Bootable USB live from Open Suse 12.3 ISO
Hai,
Here is the solution for the opensuse bootable usb live.
Download the Opensuse 12.3 from :
http://mirror1.hs-esslingen.de/pub/Mirrors/ftp.opensuse.org/distribution/12.3/iso/openSUSE-12.3-GNOME-Live-i686.iso
Now login as root in any linux machine
$ cd < location of folder of iso>
$ isohybrid openSUSE-12.3-GNOME-Live-i686.iso
$ dd if=openSUSE-12.3-GNOME-Live-i686.iso of=/dev/sdb1 bs=4M
/dev/sdb1 : your usb drive.
By this we can make openSUSE on USB
Here is the solution for the opensuse bootable usb live.
Download the Opensuse 12.3 from :
http://mirror1.hs-esslingen.de/pub/Mirrors/ftp.opensuse.org/distribution/12.3/iso/openSUSE-12.3-GNOME-Live-i686.iso
Now login as root in any linux machine
$ cd < location of folder of iso>
$ isohybrid openSUSE-12.3-GNOME-Live-i686.iso
# what this command do , ISOLINUX supports a "hybrid mode" which can be booted from either CD-ROM or from a device which BIOS considers a
hard disk or ZIP disk, e.g. a USB key or similar.
hard disk or ZIP disk, e.g. a USB key or similar.
$ dd if=openSUSE-12.3-GNOME-Live-i686.iso of=/dev/sdb1 bs=4M
/dev/sdb1 : your usb drive.
By this we can make openSUSE on USB
Tuesday 20 August 2013
Solution : SQUID PROXY - NCSA AUTHENCIATION PROBLEM
SQUID PROXY SERVER CONFIG FILE:
sample /etc/squid3/squid.conf :
-------------------------------
auth_param basic program /usr/lib/squid3/ncsa_auth /etc/squid3/passwd
auth_param basic children 5
auth_param basic realm Squid proxy with NCSA
auth_param basic credentialsttl 2 hours
auth_param basic casesensitive off
acl usrs proxy_auth REQUIRED
http_access allow usrs
http_access deny all
http_port 3128
> Before starting the Squid server we need to create a password file by using NCSA for that we need
apache2-utils (ubuntu)
> for the first time creating the passwd we need to use -c option for htpasswd command , for next don't use -c
$ /usr/bin/htpasswd -c /etc/squid3/passwd somexyz
New password:
Re-type new password:
Adding password for user somexyz
>Now start squid server :
$ service squid3 start
> Squid proxy will start but we not able log in, because the password file storing in the format md5, but Squid 3 uses Crypt format password.
> To uses Crypt format password user we need to use "-d" for more details "/usr/bin/htpasswd --help"
$ /usr/bin/htpasswd -d /etc/squid3/passwd somexyz1
New password:
Re-type new password:
Adding password for user somexyz
> Now restart the Squid service
$ service squid3 stop
$ service squid3 start
> Now we can login with somexyz1 user account into squid proxy : - )
Re-type new password:
Adding password for user somexyz
> Now restart the Squid service
$ service squid3 stop
$ service squid3 start
> Now we can login with somexyz1 user account into squid proxy : - )
Wednesday 14 August 2013
PUTTY command line ssh login with plink
First we need Putty in Linux ?
Download the PUTTY source code file from :
http://the.earth.li/~sgtatham/putty/latest/putty-0.63.tar.gz
After that we need build that package. we need gcc and gcc-devel packages, if you want gui we need gtk-2 packages
$ tar -zxvf putty-0.63.tar.gz
$ cd putty-0.63
$ ./configure --prefix=/apps/putty # your installation location
(or)
$ ./configure #if you don't want seperatly remove --prefix
$ make install
$ cd /app/putty/bin
$ ./plink -ssh -l somexyz 10.0.2.200
:
:
$ # login into 10.0.2.200
$ exit
for enabling X11 in plink as :
$./plink -ssh -X -l somexyz 10.0.2.200
for command line passing password as :
$ ./plink -ssh -X -l somexyz -pw xyzabc 10.0.2.200
for running remote system commands as :
$ ./plink -ssh -X -l somexyz -pw xyzabc 10.0.2.200 "uname -a"
Sunday 4 August 2013
Solution : javac command not found in Linux
Hi if you get javac command not found in Linux even you have
java-open jdk installed means java-devel not there
Install java-devel
In Fedora
yum install java-devel
In Ubuntu
apt-get install java-devel
java-open jdk installed means java-devel not there
Install java-devel
In Fedora
yum install java-devel
In Ubuntu
apt-get install java-devel
Steps to Sign a JAR file using self signed Certificate
To Sign a JAR file using self signed Certificate follow below steps
keytool come with Java, so install Java First
Step1 : Create .jar file from .class file
C:\javaapp> jar cvf VideoANTyd.jar VideoANTyd.class
Step2 : Create a Key by using key tool
C:\javaapp>keytool -genkey -alias selfsigned -keyalg RSA -keysize 2048 -validity
360
Enter keystore password:
keytool error: java.io.IOException: Keystore was tampered with, or password was
incorrect
If you get above error goto C:/Users/yourname/ and delete .keystore file
Now again
C:\javaapp>keytool -genkey -alias selfsigned -keyalg RSA -keysize 2048 -validity
360
Enter keystore password:
Re-enter new password:
What is your first and last name?
[Unknown]: Name
What is the name of your organizational unit?
[Unknown]: VideoANT
What is the name of your organization?
[Unknown]: PMDOX
What is the name of your City or Locality?
[Unknown]: YourCity
What is the name of your State or Province?
[Unknown]: YourState
What is the two-letter country code for this unit?
[Unknown]: YourCountry
Is CN=Name, OU=VideoANT, O=PMDOX, L=YourCity, ST=YourState, C=YourCountry cor
rect?
[no]: yes
Enter key password for <selfsigned>
(RETURN if same as keystore password):
Step3 : Create certificate from Above Key
C:\javaapp>keytool -export -alias selfsigned -file VideoANT.crt
Enter keystore password:
Certificate stored in file <VideoANT.crt>
Step4 : Sign a JAR file
C:\javaapp>jarsigner VideoANTyd.jar selfsigned
Enter Passphrase for keystore:
C:\javaapp>
Success
Thursday 1 August 2013
Simple and Best Linked List example in C
Hi,
Below linked list example is taken from http://www.macs.hw.ac.uk/~rjp/Coursewww/Cwww/linklist.html it is easy and working properly. I did small modifications to it
This example is single linked list
#include<stdlib.h>
#include<stdio.h>
struct list {
int val;
struct list * next;
};
void main() {
struct list * head = NULL;
struct list * curr = NULL;
//Storing data into Linked list
curr = (struct list *)malloc(sizeof(struct list));
curr->val = 10;
curr->next = head;
head = curr;
//Storing data into Linked list
curr = (struct list *)malloc(sizeof(struct list));
curr->val = 5;
curr->next = head;
head = curr;
curr = head;
//Reading data from Linked list (it print from tail)
while(curr) {
printf("%d\n", curr->val);
curr = curr->next ;
}
}
Compilation Output
[root@system Desktop]# gcc linkedlist.c
[root@system Desktop]# ./a.out
5
10
[root@system Desktop]#
Solution : Implicit Declaration Of Function malloc error in Linux Kernel
Hi if you get Implicit Declaration Of Function malloc error in Linux Kernel then
solution is use vmalloc or kmalloc
kmalloc: Best used for fast allocations that are smaller than a page (PAGE_SIZE, 0x1000 on most architectures). It doesn't involve mapping memory, so you get the memory straight from the kernel's 1:1 physical memory mapping. You get physically contingent memory. Note that if you you want to allocate more than one page (i.e. order > 0), you risk bumping into external fragmentation issues - i.e. the call might fail even if there is enough free. Higher order - higher chance for allocation failure, and up-time plays a factor here too.
If you want to achieve maximal allocation efficiency then using your own kmem_cache for each type of struct is the way to go (the other benefits for this strategy are being able to monitor the state of your allocations from /proc and catching memory leaks more easily).
vmalloc: Allocations of more than one page. You get mapped-memory in kernel space. Behind the scenes it is similar to what userspace gets - the kernel allocates a bunch of pages and maps them in a virtual address space. This allocation is slower than kmalloc's, and memory accesses might incur a bit more overhead
Avoid vmalloc whenever possible and use kmalloc
kmalloc() should only be used allocating small amounts of memory (a few kb). vmalloc() is better for larger amounts
Tuesday 30 July 2013
Solution: Bind Failed Permission Denied error in Linux
if you get Bind Failed Permission Denied error in Linux
for different application like "iperf" etc
Solution is : Disable SeLinux
Below steps show how to disable SELINUX
To test SeLinux is running or not
[root@center /]# selinuxenabled && echo enabled || echo disabled
enabled
So SELINUX is Enabled
To stop temporary
[root@xyz~] sudo setenforce 0
To stop SELINUX permanently
[root@center /]# vim /etc/selinux/config
#And change
SELINUX=enforcing
to
SELINUX=disabled
Save the File and Restart the system to take effect
Monday 29 July 2013
How to Find File Location in Linux
This post explains How to Find File Location in Linux
Find file in home directory
[root@sys ~]# find /home -name "finename.txt"
Find file in entire system
[root@sys ~]# find / -name "filename.txt"
Find file containing perticular word example httpd
[root@sys ~]# find /etc -name "*httpd*"
Find files of perticular type example .pdf file or .jpg or .png etc
[root@sys ~]# find /home -name "*.pdf"
Unable to Login as root authentication failure error in Linux
If you get Unable to Login as root authentication failure error in Linux
Modify two files
1. vi /etc/pam.d/gdm-password
in this file put comment on line "auth required pam_succeed_if.so user != root quiet" like below
auth [success=done ignore=ignore default=bad] pam_selinux_permit.so
auth substack password-auth
auth required pam_succeed_if.so user != root quiet
auth optional pam_gnome_keyring.so
.....
.....
To
auth [success=done ignore=ignore default=bad] pam_selinux_permit.so
auth substack password-auth
#auth required pam_succeed_if.so user != root quiet
auth optional pam_gnome_keyring.so
....
...
2. vi /etc/pam.d/gdm-fingerprint
in this file put comment on line "auth required pam_succeed_if.so user != root quiet" like below
auth substack fingerprint-auth
auth required pam_succeed_if.so user != root quiet
account required pam_nologin.so
account include fingerprint-auth
password include fingerprint-auth
....
....
To
auth substack fingerprint-auth
#auth required pam_succeed_if.so user != root quiet
account required pam_nologin.so
account include fingerprint-auth
password include fingerprint-auth
....
....
3. Logout and Re-Login as root
Thursday 25 July 2013
Steps to Compile Linux Kernel with Different Configuration Options
Below Steps describe How to Compile Linux Kernel with Different Configuration Options
1. Download Kernel from https://www.kernel.org/
download tar.xz file Example:https://www.kernel.org/pub/linux/kernel/v3.x/linux-3.10.3.tar.xz
2. Extract tar.xz file
tar -xvf linux-3.10.3.tar.xz
3. Goto Extracted folder
cd linux-3.10.3
4. Configuration command is
make menuconfig
based on requirement you can choose different configuration options
"make config" Plain text interface.
"make menuconfig" Text based color menus, radiolists & dialogs.
"make xconfig" X windows (Qt) based configuration tool.
"make gconfig" X windows (Gtk) based configuration tool.
"make oldconfig" Default all questions based on the contents of
your existing ./.config file and asking about
new config symbols.
"make silentoldconfig"
Like above, but avoids cluttering the screen
with questions already answered.
Additionally updates the dependencies.
"make defconfig" Create a ./.config file by using the default
symbol values from either arch/$ARCH/defconfig
or arch/$ARCH/configs/${PLATFORM}_defconfig,
depending on the architecture.
"make ${PLATFORM}_defconfig"
Create a ./.config file by using the default
symbol values from
arch/$ARCH/configs/${PLATFORM}_defconfig.
Use "make help" to get a list of all available
platforms of your architecture.
"make allyesconfig"
Create a ./.config file by setting symbol
values to 'y' as much as possible.
"make allmodconfig"
Create a ./.config file by setting symbol
values to 'm' as much as possible.
"make allnoconfig" Create a ./.config file by setting symbol
values to 'n' as much as possible.
"make randconfig" Create a ./.config file by setting symbol
values to random values.
4. make
5. make modules
6. make modules_install
7. make install
8. Check /boot/grub/grub.conf file whether new kernel entry added or not
if it is not there try "update-grub" command
Wednesday 3 July 2013
Upgrade Fedora 18 to Fedora 19
Fedora 19 (release 03 July 2013) :
First we need fedup software to update the fedora 18 to fedora 19
1) install fedup software by yum
# yum -y install fedup
2) Now it time to start the update, before that close all applications ( because it reboot after downloading the packages ). Using Fedup command we will update the fedora 18.
# fedup --network 19 --instrepo=http://fedora.mirror.nexicom.net/linux/releases/19/Fedora/i386/os
This command will start downloading the Fedora 19 packages and setup the update startup for the system.
Here we are updating Fedora 18 32 bit OS to Fedora 19 32 bit
If you have Fedora 18 64 bit then change the instrepo url as :
# fedup --network 19 --instrepo=http://fedora.mirror.nexicom.net/linux/releases/19/Fedora/x86_64/os
3) That is it will start download the all the packages required and reboot with fedup grub menu option and install the downloaded packages. It will reboot after completion.
It start will fedora 19 Enjoy with less bugs.
4) There is bug in fedora19 grub2 theme for we nee to install grub2 theme software by yum
# yum install grub2-starfield-theme
Friday 26 April 2013
Solution : PHP Warning: mysql_connect(): No such file or directory
If you get PHP Warning: mysql_connect(): No such file or directory and unable to connect mysql through php then change localhost to 127.0.0.1 while connecting to database
example:
$connection = mysql_connect('localhost', 'root', 'password');
to
$connection = mysql_connect('127.0.0.1', 'root', 'password');
example:
$connection = mysql_connect('localhost', 'root', 'password');
to
$connection = mysql_connect('127.0.0.1', 'root', 'password');
Wednesday 10 April 2013
Solution : The mysqli extension is missing. Please check your PHP configuration
if you get The mysqli extension is missing. Please check your PHP configuration error in phpmyadmin
follow two steps
1. install php-mysql
in redhat , fedora
yum install php-mysql
in ubuntu
apt-get install php-mysql
2. restart apache server
restart mysql
follow two steps
1. install php-mysql
in redhat , fedora
yum install php-mysql
in ubuntu
apt-get install php-mysql
2. restart apache server
restart mysql
Tuesday 9 April 2013
Steps to Install Python3 in Linux through Command Line
To Install Python3 in linux through Command line follow below commands
Dependencies for Python3 is gcc and some times zlib-devel so install these first
in redhat ( RHEL ), fedora etc
commands are
root@bt:~# yum install gcc
root@bt:~# yum install zlib-devel
in Ubuntu, Linux Mint etc
commands are
root@bt:~# apt-get install gcc
root@bt:~# apt-get install zlib-devel
Download latest version of Python3 ( bzipped source tarball) from http://www.python.org/download/
Now it is Python-3.3.1.tar.bz2
root@bt:~# wget http://www.python.org/ftp/python/3.3.1/Python-3.3.1.tar.bz2
Extract It
root@bt:~# bzip2 -cd Python-3.3.1.tar.bz2 | tar xvf -
Goto Extracted Folder
root@bt:~# cd Python-3.3.1
Configure Python3
root@bt:~/Python-3.3.1# ./configure --prefix=/opt/python3
Make
root@bt:~/Python-3.3.1# make
Install
root@bt:~/Python-3.3.1# make install
Add Shortcut
root@bt:~/Python-3.3.1# ln -s /opt/python3/bin/python3 /usr/bin/python3
Use Python3
root@bt:~/Python-3.3.1# python3
Python 3.3.1 (default, Apr 9 2013, 12:32:54)
[GCC 4.4.5 20101112 (Red Hat 4.4.5-2)] on linux
Type "help", "copyright", "credits" or "license" for more information.
>>>
Add Shortcut
root@bt:~/Python-3.3.1# ln -s /opt/python3/bin/python3 /usr/bin/python3
Use Python3
root@bt:~/Python-3.3.1# python3
Python 3.3.1 (default, Apr 9 2013, 12:32:54)
[GCC 4.4.5 20101112 (Red Hat 4.4.5-2)] on linux
Type "help", "copyright", "credits" or "license" for more information.
>>>
Saturday 6 April 2013
Solution: Unable to access mysql server of Amazon ec2 instance remotely
If you have problem in accessing mysql server server publicly or remote even in the security group if you open mysql port 3306 in inbound rules. to solve this problem simply stop iptables.
First check port 3306 whether it is Listining or not
[root@ip-10-142-194-252 ~]# netstat -ant
Active Internet connections (servers and established)
Proto Recv-Q Send-Q Local Address Foreign Address State
tcp 0 0 0.0.0.0:3306 0.0.0.0:* LISTEN
tcp 0 0 0.0.0.0:40972 0.0.0.0:* LISTEN
tcp 0 0 0.0.0.0:111 0.0.0.0:* LISTEN
tcp 0 0 0.0.0.0:22 0.0.0.0:* LISTEN
tcp 0 0 127.0.0.1:631 0.0.0.0:* LISTEN
tcp 0 0 127.0.0.1:25 0.0.0.0:* LISTEN
tcp 0 248 10.142.194.252:22 117.213.139.76:1086 ESTABLISHED
tcp 0 0 :::111 :::* LISTEN
tcp 0 0 :::80 :::* LISTEN
tcp 0 0 :::22 :::* LISTEN
tcp 0 0 ::1:631 :::* LISTEN
tcp 0 0 :::55704 :::* LISTEN
Now stop iptables
[root@ip-10-142-194-252 ~]# service iptables stop;
iptables: Flushing firewall rules: [ OK ]
iptables: Setting chains to policy ACCEPT: filter [ OK ]
iptables: Unloading modules: [ OK ]
[root@ip-10-142-194-252 ~]#
I think now you can access.
Solution: Unable to access httpd server on Amazon ec2 instance
If you have problem in accessing http server publicly even in the security group if you open http port 80 in inbound rules. to solve this problem simply stop iptables.
First check port 80 whether it is Listining or not
[root@ip-10-142-194-252 ~]# netstat -ant
Active Internet connections (servers and established)
Proto Recv-Q Send-Q Local Address Foreign Address State
tcp 0 0 0.0.0.0:3306 0.0.0.0:* LISTEN
tcp 0 0 0.0.0.0:40972 0.0.0.0:* LISTEN
tcp 0 0 0.0.0.0:111 0.0.0.0:* LISTEN
tcp 0 0 0.0.0.0:22 0.0.0.0:* LISTEN
tcp 0 0 127.0.0.1:631 0.0.0.0:* LISTEN
tcp 0 0 127.0.0.1:25 0.0.0.0:* LISTEN
tcp 0 248 10.142.194.252:22 117.213.139.76:1086 ESTABLISHED
tcp 0 0 :::111 :::* LISTEN
tcp 0 0 :::80 :::* LISTEN
tcp 0 0 :::22 :::* LISTEN
tcp 0 0 ::1:631 :::* LISTEN
tcp 0 0 :::55704 :::* LISTEN
Now stop iptables
[root@ip-10-142-194-252 ~]# service iptables stop;
iptables: Flushing firewall rules: [ OK ]
iptables: Setting chains to policy ACCEPT: filter [ OK ]
iptables: Unloading modules: [ OK ]
[root@ip-10-142-194-252 ~]#
I think now you can access.
Saturday 30 March 2013
Solution: PHP setcookie Warning: Cannot modify header information - headers already sent
Solution: PHP setcookie Warning: Cannot modify header information - headers already sent to avoid this problem add ob_start() at beginning of php and add ob_end_flush() at end of php code like below
<?php
ob_start(); // Initiate the output buffer
//your code
ob_end_flush(); // Flush the output from the buffer
?>
<?php
ob_start(); // Initiate the output buffer
//your code
ob_end_flush(); // Flush the output from the buffer
?>
Wednesday 27 March 2013
How to Flush route table in Linux
To remove or Flush all entries in route table the command used is
root@system1:~# ip route flush table main
Run Above command as root
root@system1:~# ip route flush table main
Run Above command as root
Friday 22 March 2013
PHP Replace new lines, tabs and multiple spaces with single space
preg_replace('/\\s+/', ' ',$data) used to Replace new lines, tabs and multiple spaces with single space in PHP
example:
<?php
$data = 'Hi tab i am
new line more spaces';
$data= preg_replace('/\\s+/', ' ',$data);
echo $data;
?>
Output:
Hi tab i am new line more spaces
Monday 18 March 2013
Upgrade Cent OS from any version to Any version
To Upgrade CentOS the common command used is yum update. This is used to Upgrade Cent OS from any version to Any version.
command:
As a Root
root@system1# yum update
command:
As a Root
root@system1# yum update
Find the size of folders in linux
Finding the size of a directory and finding the amount of free disk space that exists on your machine. The command you would use to find the directory size is ' du '. And to find the free disk space you could use ' df '.
$ du
Gives you a list of directories that exist in the current directory along with their sizes. The last line of the output gives you the total size of the current directory including its subdirectories. Note that by default the sizes given are in kilobytes.
$ du /home
The above command would give you the directory size of the directory /home
$ du -h
This command gives you a better output than the default one. The option '-h' stands for human readable format. So the sizes of the files / directories are this time suffixed with a 'k' if its kilobytes and 'M' if its Megabytes and 'G' if its Gigabytes.
$ du -sh ./*
Give you total size of each folder and files in present folder
XOR of Hexadecimals in C program Example
To do XOR in in C the operator used is "^"
#include<stdio.h>
int main()
{
int x;
int y;
int res;
printf("\n Please enter the value for first number in hex format:");
scanf("%x",&x); //reading hexadecimal value
printf("\n Please enter the value for second number in hex format:");
scanf("%x",&y);
res=x^y;
printf("\n The XOR of two numbers is: %x",res);
}
Solution: Access Variables in Different C files
To access variables in different C files, check below example
header.h
extern int a;
file1.c
#include</root/path/header.h>
int a;
a = 20;
file2.c
#include</root/path/header.h>
printf("a value is %d",a);
Note: if you compile individual file and check then you may get error
Compile like:
gcc file1.c file2.c -o out
./out
Output: a value is 20
header.h
extern int a;
file1.c
#include</root/path/header.h>
int a;
a = 20;
file2.c
#include</root/path/header.h>
printf("a value is %d",a);
Note: if you compile individual file and check then you may get error
Compile like:
gcc file1.c file2.c -o out
./out
Output: a value is 20
Solution: warning: ISO C90 forbids mixed declarations and code
If you get above warning means in your code operation code in between deceleration see below example
Invalid Code:
main(){
int a;
a = function1();
int b;
b = function2();
}
Valid Code:
main(){
int a;
int b;
a = function1();
b = function2();
}
So write all declarations one place
Invalid Code:
main(){
int a;
a = function1();
int b;
b = function2();
}
Valid Code:
main(){
int a;
int b;
a = function1();
b = function2();
}
So write all declarations one place
Tuesday 12 March 2013
Set Up SCTP in Linux From SCTP Module
Fedora has SCTP kernel as the kernel module, kernel recompile is not needed for our case. Instead, the SCTP kernel module is simply needed to be loaded into the RAM memory on the Fedora with the command ‘modprobe’. The command ‘modprobe SCTP’ plays a role on loading SCTP module into the RAM; see Figure 1

Figure 1 Load SCTP module into the kernel
The
SCTP module should be loaded on both the server and the client. After
that, it can be assumed that both the server and client have already
configured the Linux platform so that they are capable of supporting
the SCTP protocol. The next step is to activate the DAR extension of
SCTP, to ensure that mSCTP is supported by Linux. The parameter
‘addip_enable’ is the indicator whether DAR extension is active
or not. When ‘addipenable’ is 0, Add-IP extension is inactive
while it is active when ‘addip-enable’ is 1.
Command ‘echo 1>/proc/sys/net/sctp/addip_enable’ is used to make Linux support mSCTP. Command ‘more /proc/sys/net/sctp/addip_enable’ approves the information.

Figure 2 Active Add-IP extension of SCTP
One
problem with the SCTP protocol in Linux is that it does not support
SCTP APIs itself, while SCTP APIs are required to be used for coding
the mSCTP handover. At this point, we downloaded an additional tool
from http://sourceforge.net/projects/lksctp/files/ called
LKSCTP, which is able to provide SCTP API functions. There are many
versions of the LKSCTP tool, the latest one is 1.0.11. The one used
in our testbed is version 1.0.10. The following steps have been taken
to build LKSCTP in Linux:
- Become root user to install LKSCTP by command: su –
- Enter the LKSCTP directory containing the download RPM files of LKSCTP by command cd /root/sctpfolder (directory).
- Install the RPM flies by command: rpm *.lksctp-tools-1.0.10-1.rpm
- Other way is from source Untar the LKSCTP tools directory from the gzipped tarball by command: tar –xzvf lksctp-tools-1.0.10.tar
- Enter the LKSCTP tool directory by command: cd /lksctp-tools-1.0.10
- configure LKSCTP by command: ./configure
- make LKSCTP by command: make
After the success of “make” operation, the LKSCTP tools has been
loaded into the Linux
kernel. The following Figure shows how to check whether LKSCTP is
supported by
Linux or not.

Figure 3 LKSCTP tools for Linux
In Figure 3, the command ‘checksctp’ indicates
whether the server and the client support LKSCTP or not. The result
shows that both of them support LKSCTP
Above info completely Taken from http://rezkyknowledge.blogspot.in/2010/03/how-to-set-up-sctp-in-linux.html
.
.
Sunday 10 March 2013
Jquery Mobile header footer moving problem while click
This post will show how to avoid header, footer moving up and down while clicking
to avoid this problem add data-tap-toggle="false" at header and footer
example:
<!DOCTYPE html>
<html>
<head>
<meta charset="UTF-8" />
<title>App</title>
<meta content="width=device-width, minimum-scale=1, maximum-scale=1" name="viewport">
<link rel="stylesheet" href="includes/jquery.mobile-1.3.0-beta.1.min.css" />
<link rel="stylesheet" href="includes/styles.css" />
<script src="includes/jquery-1.9.0.min.js"></script>
<script src="includes/jquery.mobile-1.3.0-beta.1.min.js"></script>
</head>
<body>
<div data-role="page" id="home">
<div data-role="header" data-position="fixed" data-tap-toggle="false">
Header
</div>
<div data-role="content">
<h1>Hi</h1>
</div>
<div data-role="footer" data-position="fixed" data-tap-toggle="false">By Footer</div>
</div>
</body>
Thursday 7 March 2013
Upgrade Backtrack 5 R2 to R3
To upgrade Backtrack 5 R2 to R3 follow below steps
System@bt# sudo apt-get update && apt-get dist-upgrade
For 32 bit Systems
System@bt# apt-get install libcrafter blueranger dbd inundator intersect mercury cutycapt trixd00r artemisa rifiuti2 netgear-telnetenable jboss-autopwn deblaze sakis3g voiphoney apache-users phrasendrescher kautilya manglefizz rainbowcrack rainbowcrack-mt lynis-audit spooftooph wifihoney twofi truecrack uberharvest acccheck statsprocessor iphoneanalyzer jad javasnoop mitmproxy ewizard multimac netsniff-ng smbexec websploit dnmap johnny unix-privesc-check sslcaudit dhcpig intercepter-ng u3-pwn binwalk laudanum wifite tnscmd10g bluepot dotdotpwn subterfuge jigsaw urlcrazy creddump android-sdk apktool ded dex2jar droidbox smali termineter bbqsql htexploit smartphone-pentest-framework fern-wifi-cracker powersploit webhandler
For 64 bit Systems
System@bt# apt-get install libcrafter blueranger dbd inundator intersect mercury cutycapt trixd00r rifiuti2 netgear-telnetenable jboss-autopwn deblaze sakis3g voiphoney apache-users phrasendrescher kautilya manglefizz rainbowcrack rainbowcrack-mt lynis-audit spooftooph wifihoney twofi truecrack acccheck statsprocessor iphoneanalyzer jad javasnoop mitmproxy ewizard multimac netsniff-ng smbexec websploit dnmap johnny unix-privesc-check sslcaudit dhcpig intercepter-ng u3-pwn binwalk laudanum wifite tnscmd10g bluepot dotdotpwn subterfuge jigsaw urlcrazy creddump android-sdk apktool ded dex2jar droidbox smali termineter multiforcer bbqsql htexploit smartphone-pentest-framework fern-wifi-cracker powersploit webhandler
Solution : Backtrack 5 apt-get upgrade error var/lib/dpkg/info/w3af.postins
If you ger below error ,simply download missing file to /tmp folder
system@bt:~# apt-get upgrade
Reading package lists... Done
Building dependency tree
Reading state information... Done
The following packages have been kept back:
smartphone-pentest-framework
0 upgraded, 0 newly installed, 0 to remove and 1 not upgraded.
1 not fully installed or removed.
After this operation, 0B of additional disk space will be used.
Do you want to continue [Y/n]? y
Setting up w3af (1.2-bt2) ...
tar: pybloomfiltermmap-0.2.0.tar.gz: Cannot open: No such file or directory
tar: Error is not recoverable: exiting now
tar: Child returned status 2
tar: Exiting with failure status due to previous errors
/var/lib/dpkg/info/w3af.postinst: line 4: cd: pybloomfiltermmap-0.2.0: No such file or directory
python: can't open file 'setup.py': [Errno 2] No such file or directory
system@bt:~# cd /tmp
system@bt:/tmp#
wget http://pypi.python.org/packages/source/p/pybloomfiltermmap/pybloomfiltermmap-0.2.0.tar.gz
Now run upgrade
system@bt:~# apt-get upgrade
system@bt:~# apt-get upgrade
Reading package lists... Done
Building dependency tree
Reading state information... Done
The following packages have been kept back:
smartphone-pentest-framework
0 upgraded, 0 newly installed, 0 to remove and 1 not upgraded.
1 not fully installed or removed.
After this operation, 0B of additional disk space will be used.
Do you want to continue [Y/n]? y
Setting up w3af (1.2-bt2) ...
tar: pybloomfiltermmap-0.2.0.tar.gz: Cannot open: No such file or directory
tar: Error is not recoverable: exiting now
tar: Child returned status 2
tar: Exiting with failure status due to previous errors
/var/lib/dpkg/info/w3af.postinst: line 4: cd: pybloomfiltermmap-0.2.0: No such file or directory
python: can't open file 'setup.py': [Errno 2] No such file or directory
system@bt:~# cd /tmp
system@bt:/tmp#
wget http://pypi.python.org/packages/source/p/pybloomfiltermmap/pybloomfiltermmap-0.2.0.tar.gz
Now run upgrade
system@bt:~# apt-get upgrade
Solution : dpkg: warning: parsing file 'magic tree':error in Version string 'r1643-bt0': version number does not start with digit
If you get error like below Simple remove packages which are causing error
dpkg: warning: parsing file '/var/lib/dpkg/status' near line 5812 package 'magictree':
error in Version string 'r1643-bt0': version number does not start with digit
dpkg: warning: parsing file '/var/lib/dpkg/status' near line 16762 package 'udptunnel':
error in Version string 'r19-bt0': version number does not start with digit
dpkg: warning: parsing file '/var/lib/dpkg/status' near line 21351 package 'untidy':
error in Version string 'beta2-bt1': version number does not start with digit
dpkg: warning: parsing file '/var/lib/dpkg/status' near line 24439 package 'pwntcha':
error in Version string 'rev4780-bt3': version number does not start with digit
dpkg: warning: parsing file '/var/lib/dpkg/status' near line 40987 package 'webslayer':
error in Version string 'rev5-bt0': version number does not start with digit
dpkg: warning: parsing file '/var/lib/dpkg/status' near line 46097 package 'protos-sip':
error in Version string 'r2-bt1': version number does not start with digit
dpkg: error processing /var/cache/apt/archives/magictree_r1802-bt0_all.deb (--unpack):
parsing file '/var/lib/dpkg/tmp.ci/control' near line 3 package 'magictree':
error in Version string 'r1802-bt0': version number does not start with digit
Errors were encountered while processing:
/var/cache/apt/archives/magictree_r1802-bt0_all.deb
E: Sub-process /usr/bin/dpkg returned an error code (1)
Remove above packages
System1# apt-get remove magictree udptunnel untidy pwntcha webslayer protos-sip
Solution : Error while processing magictree_r1802-bt0_all.deb Sub-process /usr/bin/dpkg returned an error code (1)
If you get Error Like Below
Errors were encountered while processing:
/var/cache/apt/archives/magictree_r1802-bt0_all.deb
E: Sub-process /usr/bin/dpkg returned an error code (1)
Simply delete the file which causing Error
system1# rm -rf /var/cache/apt/archives/magictree_r1802-bt0_all.deb
Add HTTP Proxy to SVN - Subversion
Below Instructions show how to setup proxy for SVN -Subversion
system1# cd ~/.subversion
system1# ls
auth config README.txt servers
system1# cd ~/.subversion
system1# ls
auth config README.txt servers
Edit servers file
system1# gedit servers
Add Below Lines to servers file
[global]
http-proxy-host = your_ipaddress
http-proxy-port = 3128
http-proxy-compression = no
Tuesday 19 February 2013
Update table row in MySQL
The DQL Syntax to update row in MySQL was
UPDATE table_name SET column1=value, column2=value2 WHERE some_column=some_value
UPDATE table_name SET column1=value, column2=value2 WHERE some_column=some_value
Python read all rows of MySQL table
Below python code print all first column values of table in MySQL
query="SELECT * from table_name"
cursor.execute(query)
row = cursor.fetchone()
while row is not None:
print(row[1])
row = cursor.fetchone()
Subscribe to:
Posts (Atom)